Quickstart Guide
On this page
Welcome to SwiftLingo! This guide will walk you through the three essential steps to configure your website and go live with your new translations. Let’s get started.
1. Configure Your Website
After signing up, the first step is to tell SwiftLingo about your website. You’ll find this configuration wizard in your dashboard.
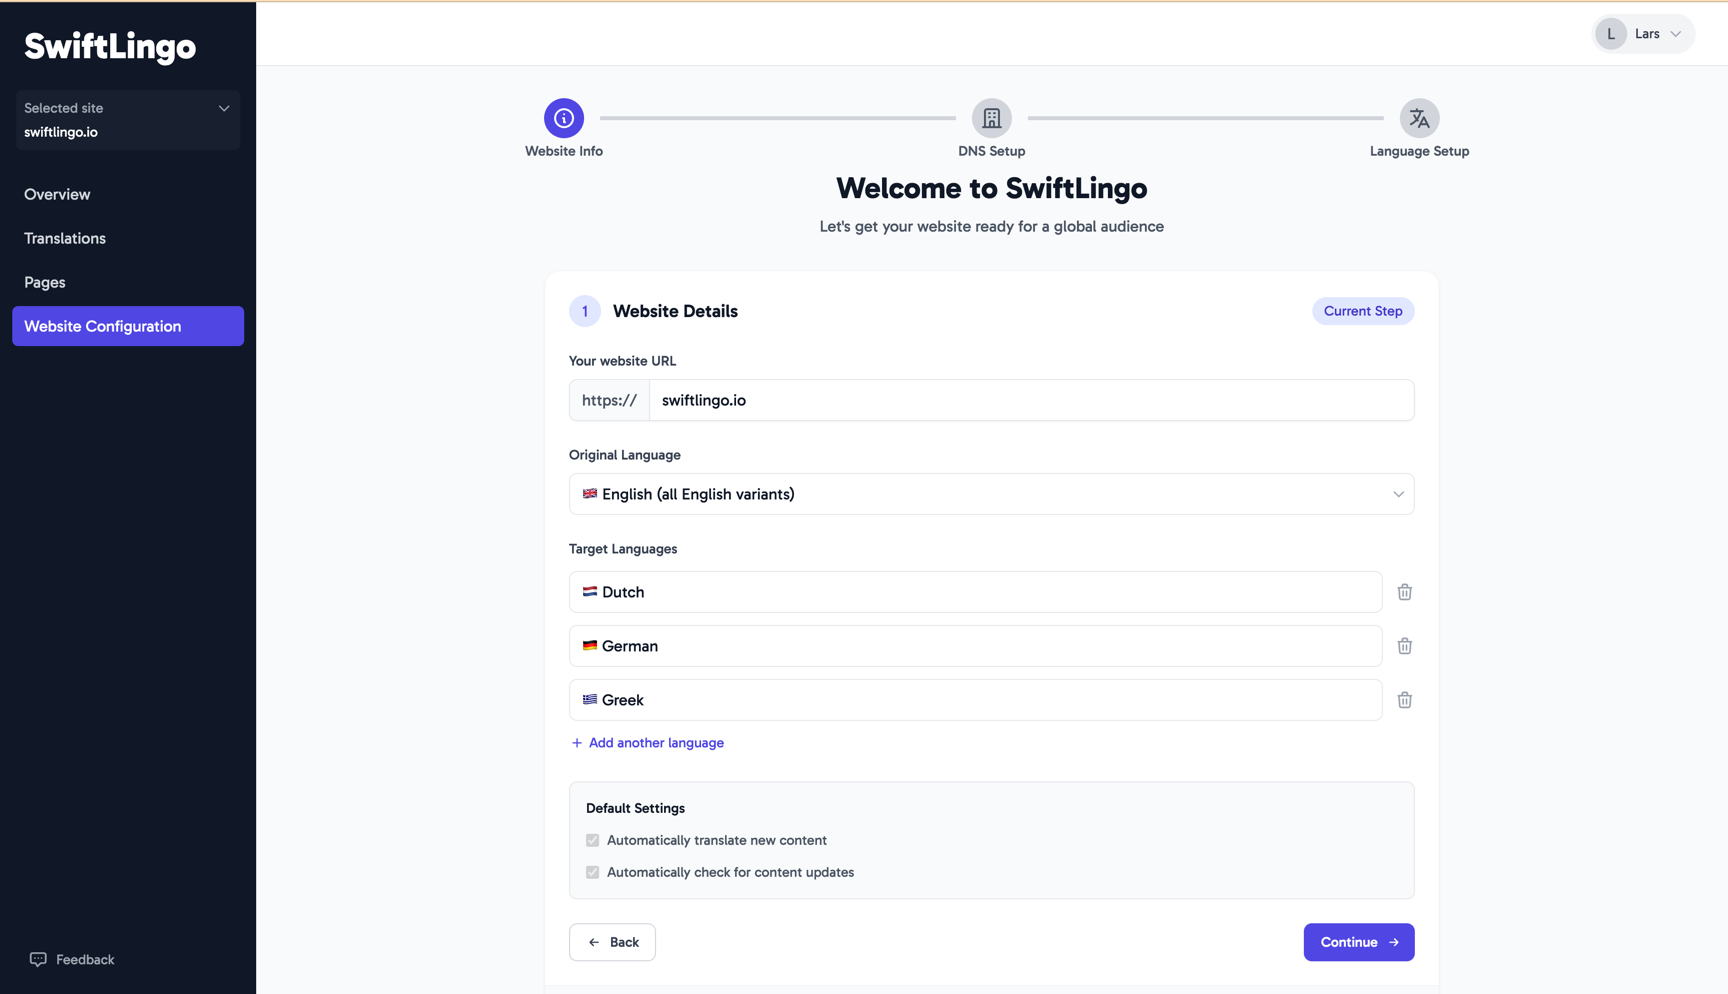
Step 1: Add Your Website URL
Enter the full URL of the website you want to translate (e.g., https://www.example.com). This is how SwiftLingo knows where to find your content.
Step 2: Set the Original Language
Select the primary language your website is written in. This will be the source language for all translations.
Step 3: Choose Target Languages
Select the language(s) you want to translate your website into. You can choose multiple languages depending on your subscription plan.
Step 4: Click Continue
Once you’ve filled in the details, click continue to move to the next step.
2. Set Up Your DNS
This step makes your translated website accessible to visitors on language-specific subdomains (e.g., fr.example.com). SwiftLingo hosts your translated pages, so you just need to point your subdomains to our service.
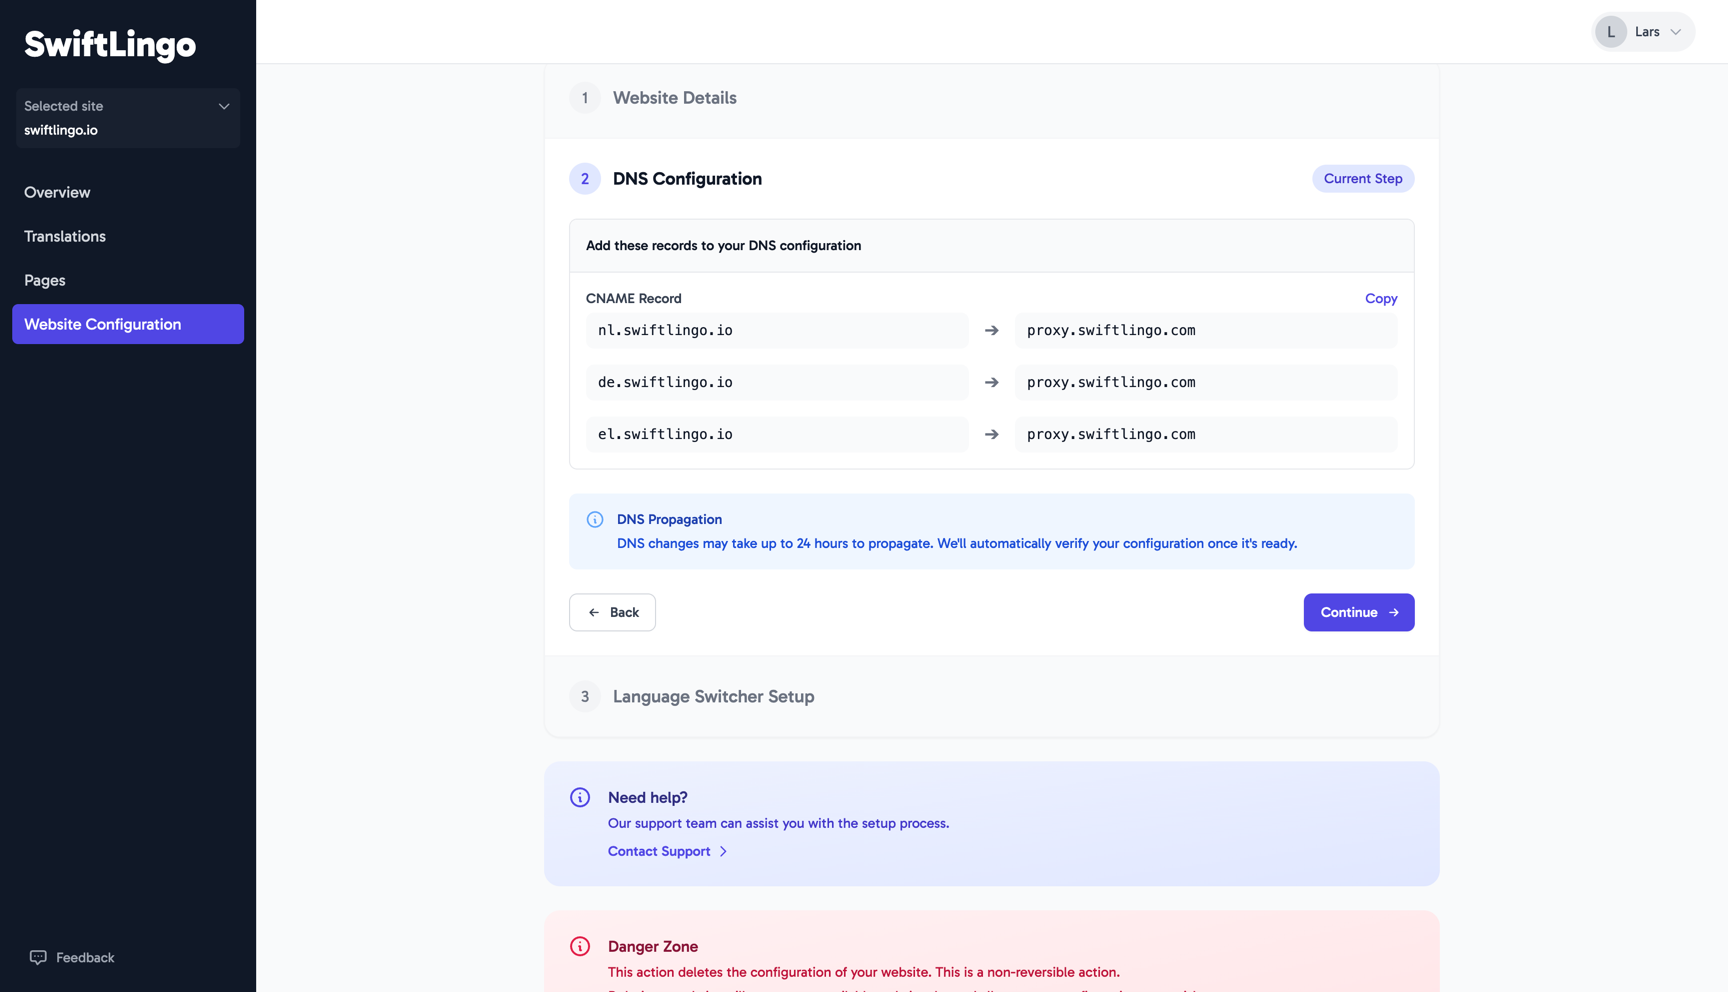
In the dashboard, you will be provided with the exact CNAME records you need to add to your domain’s DNS settings. Copy these values.
Tip
For a detailed, step-by-step guide on how to add these records with your specific domain provider, please see our DNS Configuration documentation.
3. Install the Language Switcher
Lastly, you need to add the language switcher to your website. This is a small code snippet that allows your visitors to easily select their preferred language from a dropdown menu.

Simply copy the provided HTML snippet from the dashboard and paste it into your website’s template or theme, typically in the header or footer section.
What’s Next?
Congratulations! Your website is now set up for automatic translation. Here are a few things you might want to do next:
- Explore Your Dashboard: Get familiar with the different sections where you can manage your account and translations.
- Manage Your Pages: Learn how to exclude or include specific pages from being translated.
- Edit Translations: See how you can manually edit translations to ensure they perfectly match your brand’s voice.
Need Help?
If you get stuck at any point, we’re here to help. For more support options, please visit our Support Center.
Was this page helpful?
Your feedback helps us improve.